Connect an AI assistant you already use — Claude, Microsoft Copilot, ChatGPT and others — to a Mestamaster project, and ask about the schedule in your own words. It looks things up and makes the changes, and you stay in one place.
The connection uses MCP (Model Context Protocol), an open standard that most major AI tools now support.
Beta. This feature is new and still changing. It works, but some parts may not yet behave as described here. Tell your Mestamaster contact if you find one.
What you can do
Your assistant can look up and change the same things you can in Mestamaster, such as areas, activities, teams, tasks and the schedule. You ask in your own words instead of clicking through the app.
It acts with your Mestamaster permissions, so it can only see and change what you can. The answers and the actions are the assistant’s own, so review anything that matters before you approve it.
Before you begin
You’ll need:
- A Mestamaster account with access to the project you want to connect.
- An AI assistant that supports MCP — see Which assistants work.
Part of the setup happens in your browser, where you sign in to Mestamaster and approve the access. You will need the project’s address, and most assistants also ask you to name the connection. There are no API keys to copy or store.
Your project’s address
Every project has its own address. Open the project in Mestamaster, go to Project settings → External AI assistant, and copy the address shown there.
That address tells your assistant which project to work with, so you use a different address for each project you connect.
If the tab shows a notice instead of an address, the connection isn’t switched on for that project. A project manager can switch it on under Project settings → General → Features. If it isn’t part of your plan, the tab says so.
We suggest naming each connection after its project. If you work on several projects you will have several Mestamaster connections, and without names they’ll look identical.
Which assistants work
Any assistant that supports MCP can connect. Some need a paid plan, and on a work account your IT department often has to add the connection for you. These are the common ones:
| Assistant | Plans that allow a custom connection | Who can add it |
|---|---|---|
| Claude | Free (one connector), Pro, Max, Team, Enterprise | Anyone on Free, Pro and Max; an Owner on Team and Enterprise |
| Microsoft Copilot | Copilot Studio, which needs its own licences — one for the organisation and one per user — separate from Microsoft 365 Copilot | Anyone holding a Copilot Studio User License. Guest accounts cannot |
| ChatGPT | On the web: Plus, Pro, Business, Enterprise and Edu, with developer mode on. In the desktop app: OpenAI states no plan limit | You. On a work account, workspace owners control what is allowed |
| Gemini | Gemini Enterprise — Standard, Plus, Pay-as-you-go or Frontline edition | An administrator with the Discovery Engine Editor role |
| Le Chat | Mistral states no plan limit | An administrator. On Free, Pro and Student the account owner is the administrator by default |
Checked against each vendor’s own documentation on 18 September 2026. Vendors change this often — if what you see doesn’t match this table, their documentation is the authority, not ours.
The walkthrough below uses Claude. If you use a different assistant, go straight to Connect another assistant.
Connect in Claude
This works on claude.ai and in the Claude desktop app.
Can’t find Add custom connector? On Team and Enterprise plans only an Owner can add one. Ask an Owner to add it, then connect with your own account — see If you can’t add it yourself.
- Open Settings → Connectors.
- Click Add custom connector.
- Fill in the fields:
- Name — something recognizable, e.g.
Mestamaster – Tower A. - Remote MCP server URL — your project’s address from above.
- Name — something recognizable, e.g.
- Click Add, then Connect.
- A browser window opens — sign in to Mestamaster and approve access (see Authorizing access below).
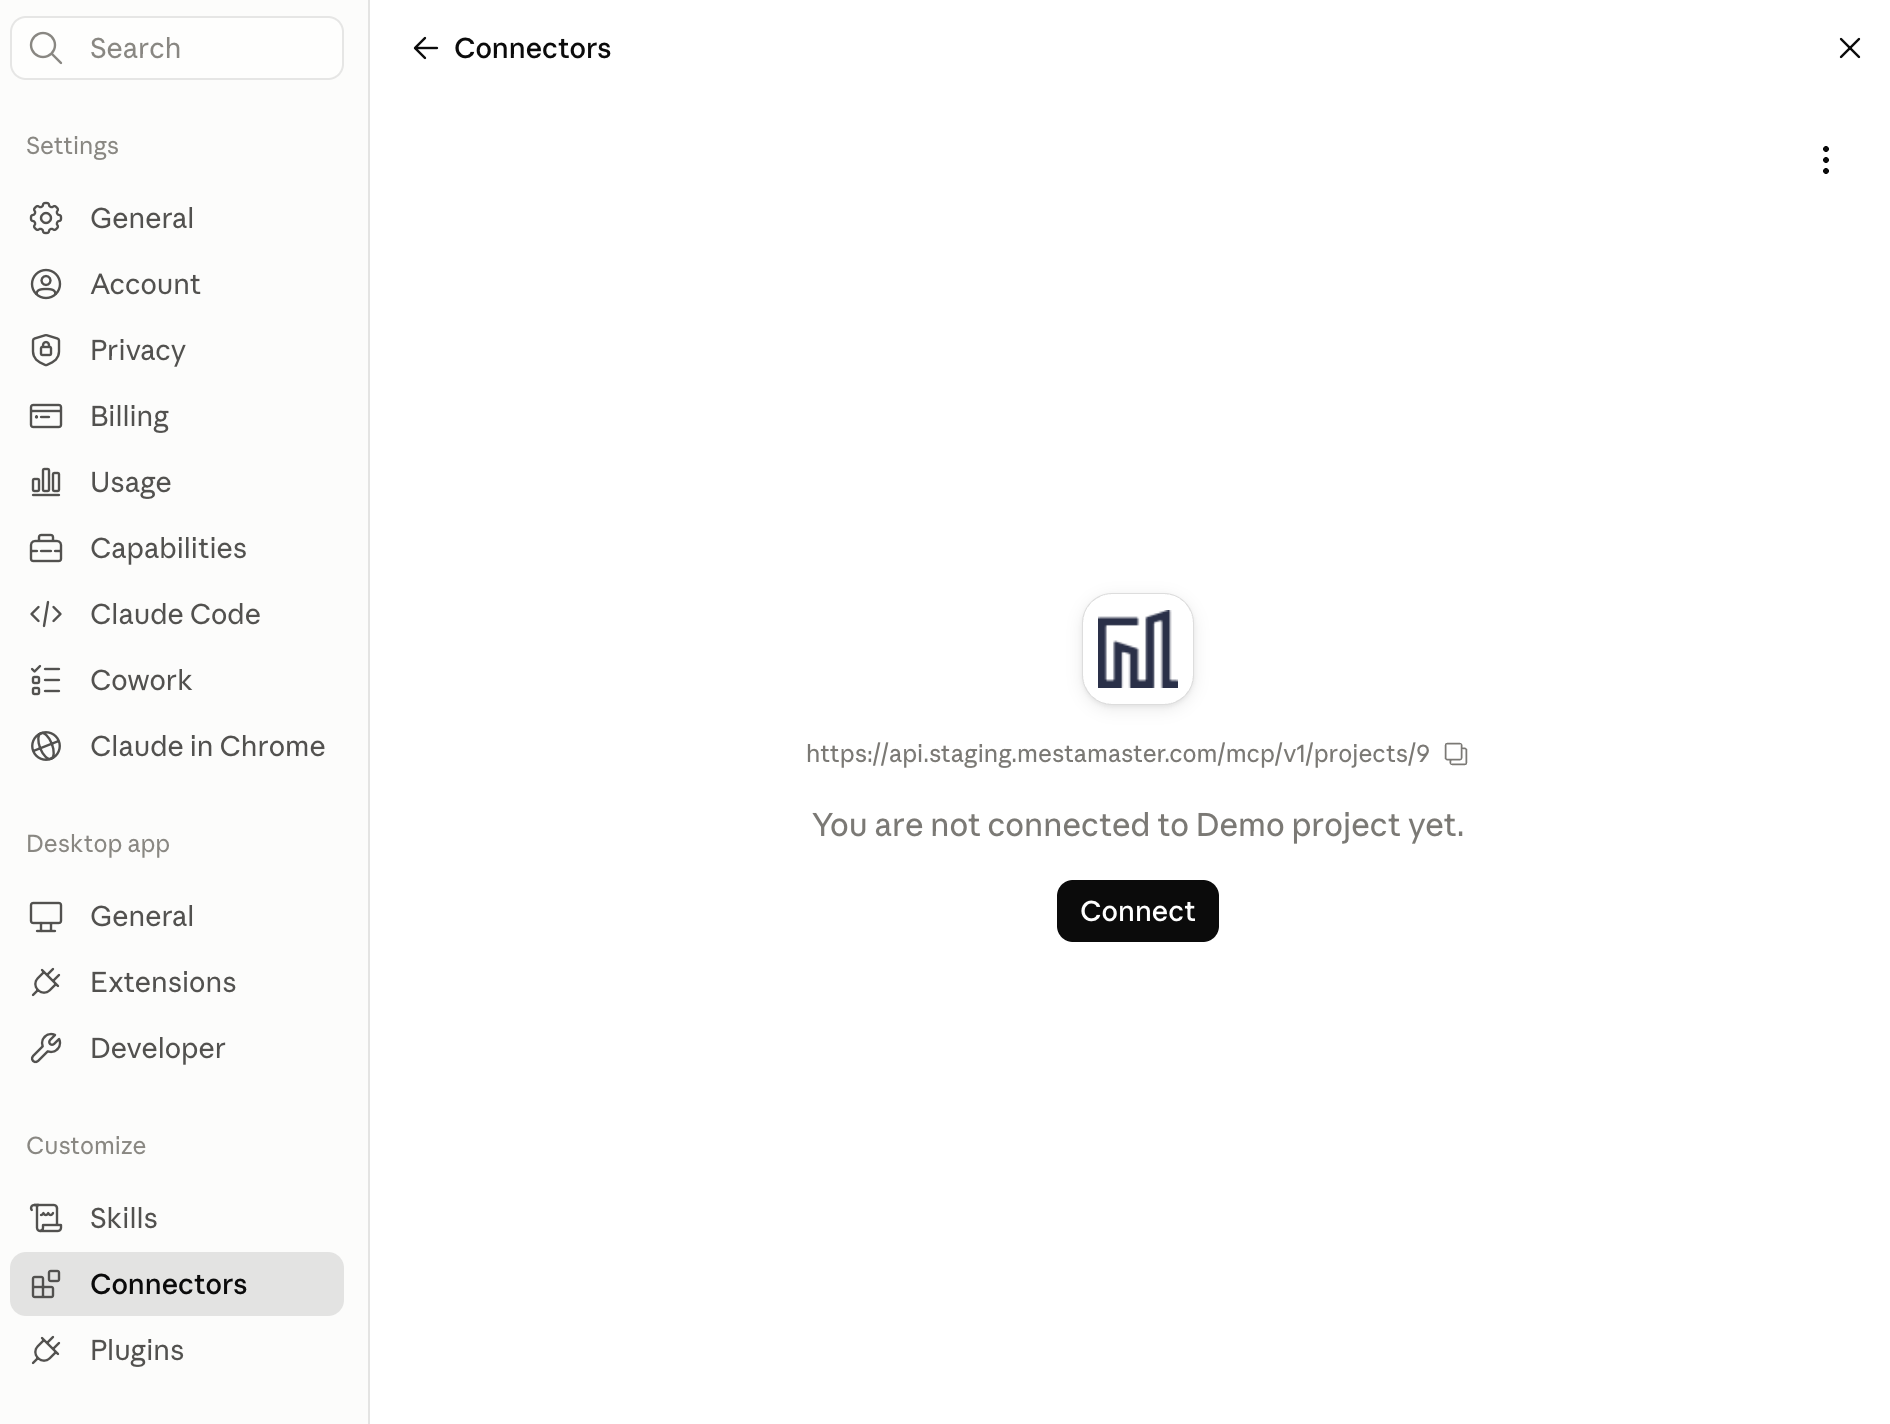
The connection now shows as connected. Open a new chat and switch Mestamaster on for it. Anthropic’s guide
Connect another assistant
Every assistant needs the same thing: your project’s address. Only the place you add it differs. Each one below has a short note and a link to the vendor’s own instructions, which stay more up to date than ours would.
Microsoft Copilot
The connection is made in Copilot Studio, not in Microsoft Copilot itself: Tools → Add a tool → New tool → Model Context Protocol, then a name, a description and your project’s address, with OAuth 2.0. The agent you build there is what appears in Microsoft Copilot. Copilot Studio is licensed separately from Microsoft 365 Copilot. Microsoft’s guide
ChatGPT
The desktop app is the simplest way: Settings → MCP servers → Add server, choose Streamable HTTP, paste the address and sign in.
On the web there is no direct setting. Turn on Settings → Security and login → Developer mode, then add the server as a developer-mode app under Plugins. Developer mode is available on Plus, Pro, Business, Enterprise and Edu. OpenAI asks you to confirm write actions, and advises checking what each one will send before you approve it. OpenAI’s MCP documentation · Developer mode
Gemini
In Gemini Enterprise, an administrator adds your project’s address as a custom MCP data store. This needs the Discovery Engine Editor role, and works on the Standard, Plus, Pay-as-you-go and Frontline editions. Google’s guide
Le Chat
Open Connectors, select + Add Connector and switch to the Custom MCP Connector tab. This is an administrator-only feature; on Free, Pro and Student plans the account owner is the administrator by default. Mistral’s guide
If you can’t add it yourself
On a work account, the setting that adds a connection is often visible to administrators only. If you can’t find it, or it won’t save, that is usually why — ask your IT department to add it.
Project settings → External AI assistant has a ready-made message for them, with the project’s address and what they need to know. Copy it and send it on. More detail for them is under Security & access.
Authorizing access
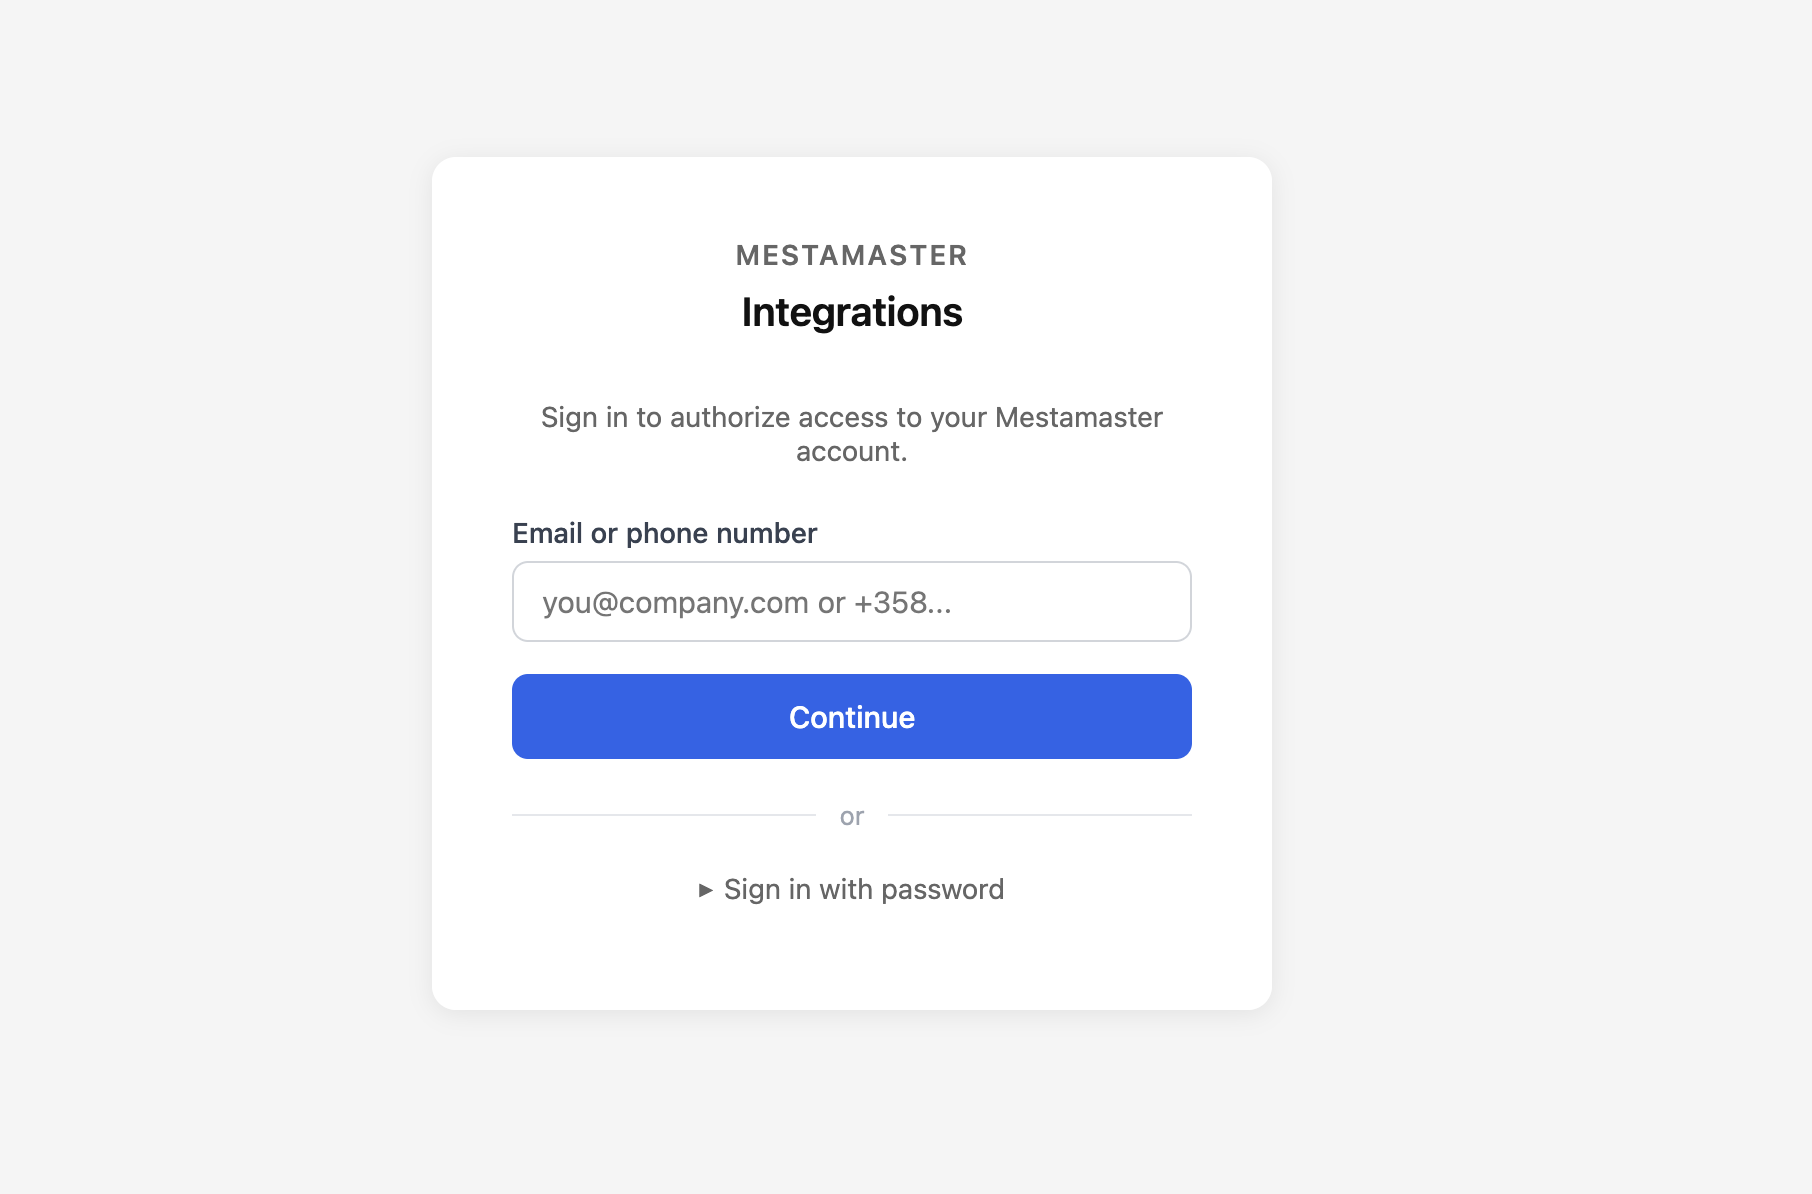
The first time you connect, your browser opens Mestamaster’s sign-in page. It is the same for every assistant.
1. Sign in with your Mestamaster account:
2. Review the access the assistant is asking for, then click Authorize:
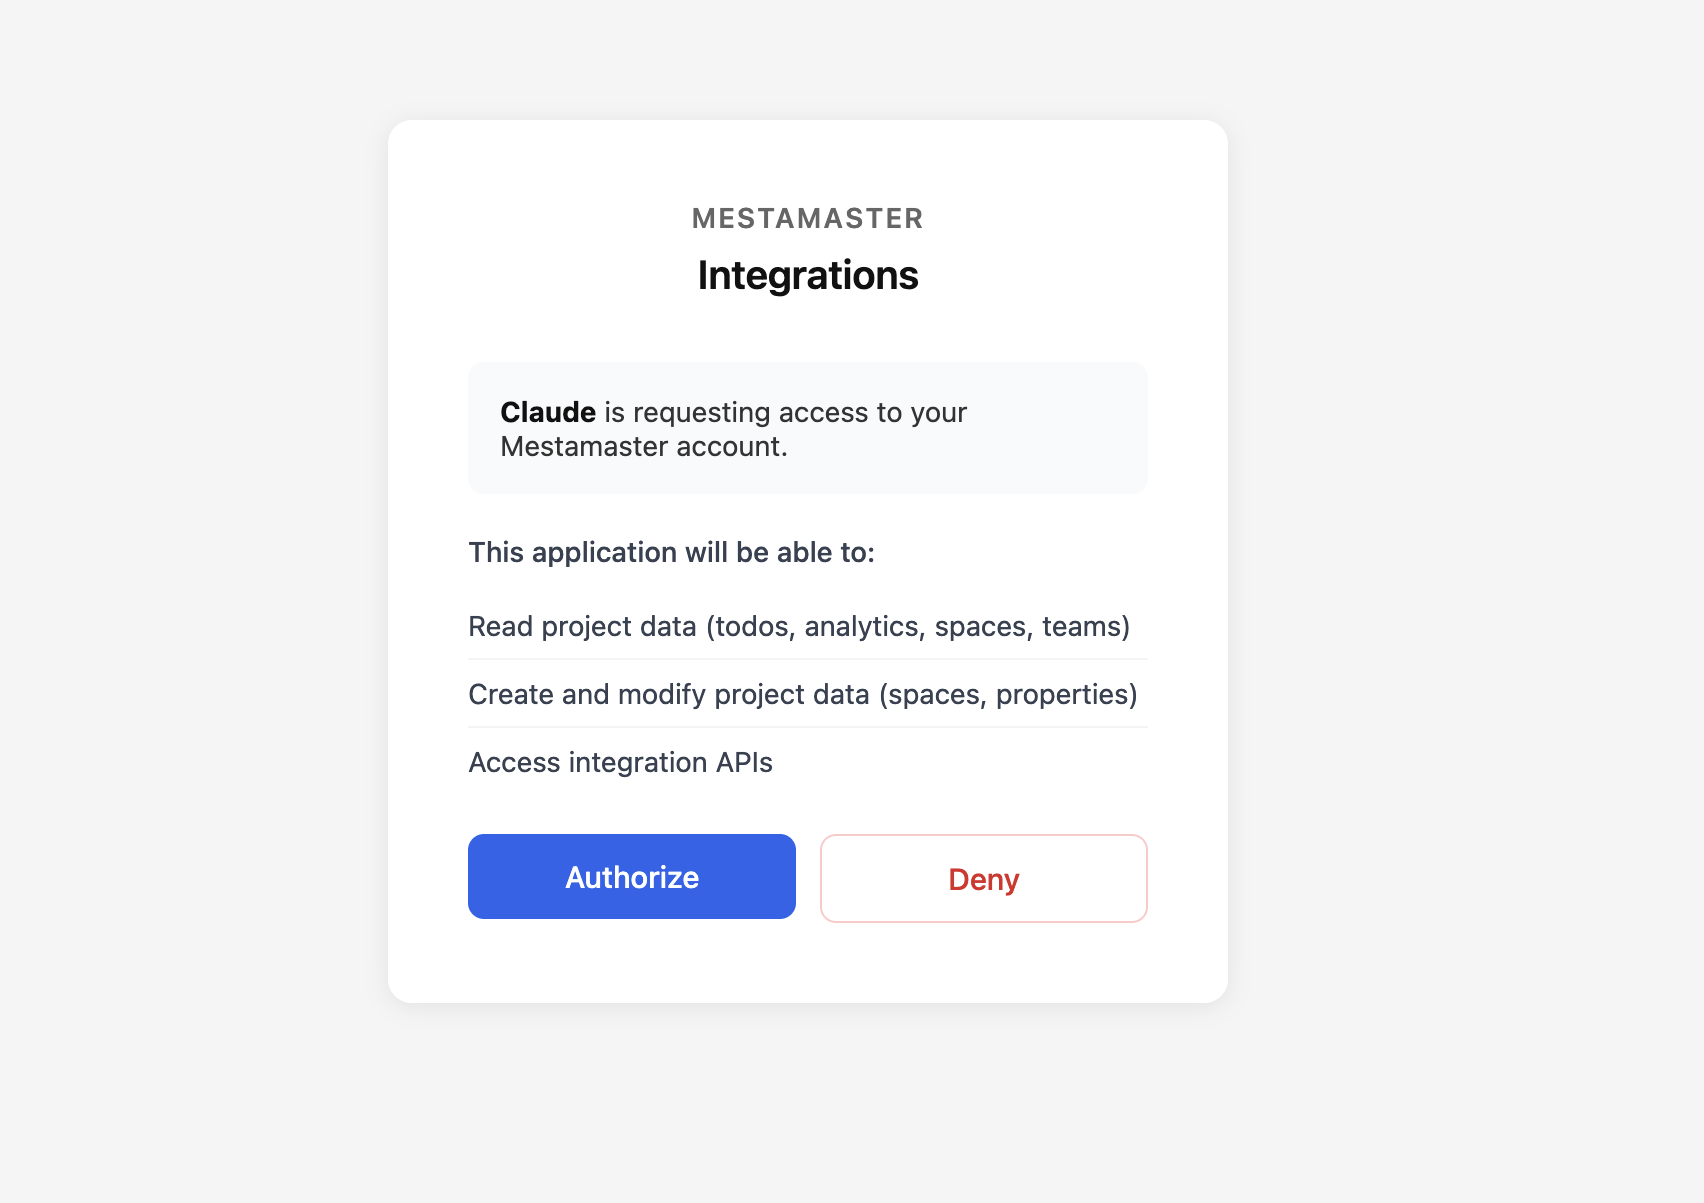
After you authorize, the browser returns you to your assistant and the connection is live. You only need to do this once for each project.
Verify it works
Ask your assistant something about the project that only needs looking up, for example:
- “How many areas are still unfinished?”
- “Which teams are behind schedule next week?”
- “List the tasks that are past their due date.”
If you get a real answer drawn from your project, the connection is working. If you don’t, see Troubleshooting.
Troubleshooting
| Problem | What to check |
|---|---|
| The connection won’t save, or shows an error | Confirm the address is exactly the one shown in Project settings → External AI assistant. |
| Stuck on sign-in | Complete the sign-in in the browser window that opened, then return to your assistant. Pop-up blockers can interrupt this. |
| “Unauthorized” / access denied | Your account may not have access to that project. Confirm with your Mestamaster contact. |
| Wrong project’s data | Each address points to one project, so you may have several Mestamaster connections. Check which one is switched on in the chat, and that you copied the address from the project you meant. |
| I can’t find where to add a connection | On a work account this is often an administrator-only setting. See If you can’t add it yourself. |
| The assistant doesn’t use Mestamaster | Connections are switched on per chat, and a chat opened before you connected won’t use it. Start a new chat and switch Mestamaster on for it. |
| My plan doesn’t allow it | Check Which assistants work for the plans each assistant requires. |
What it costs
Mestamaster does not charge anything for the connection.
Using it counts against your assistant’s own plan, the same as any other chat you have with it, so heavy use may need a bigger plan there. Some assistants also require a paid plan before they allow a custom connection at all — see Which assistants work.
Where your project data goes
- What leaves Mestamaster. Only what the assistant asks for, only from the project the address points to, and only when you or your assistant makes a request. Nothing is exported in bulk and nothing is sent on a schedule.
- Where we send it. Only to the assistant you connected, over HTTPS. What happens to it after it arrives is decided by that assistant and its terms, not by us.
- Storage and training. This connection does not change how Mestamaster stores or uses your project data. If your organisation has rules about AI, read your assistant’s terms as well.
Security & access
- The connection is a remote MCP server over HTTPS. Nothing is installed.
- Sign-in is OAuth, using your own Mestamaster login. Each person signs in with their own account and approves access themselves. There are no API keys, no shared passwords, and no long-lived keys to leak.
- The assistant can only see and do what the signed-in person’s own account can in that project. Nobody gains access they did not already have.
- Adding the connection once covers everyone on that project — each person then signs in for themselves.
- Access can be withdrawn from either end, and individual tools can be limited — see Limiting and revoking access.
- Only connect from clients and machines you trust.
Limiting and revoking access
Every assistant handles this differently, so check its own page. Two things are worth looking for: whether you can require approval before the assistant changes anything, and where you disconnect it.
In Claude, both sit in the connection itself, under Settings → Connectors:
- Each tool can be set to run freely, ask first, or be blocked. Set anything that changes the project to Needs approval if you want to see every change before it happens.
- Disconnect ends access immediately.
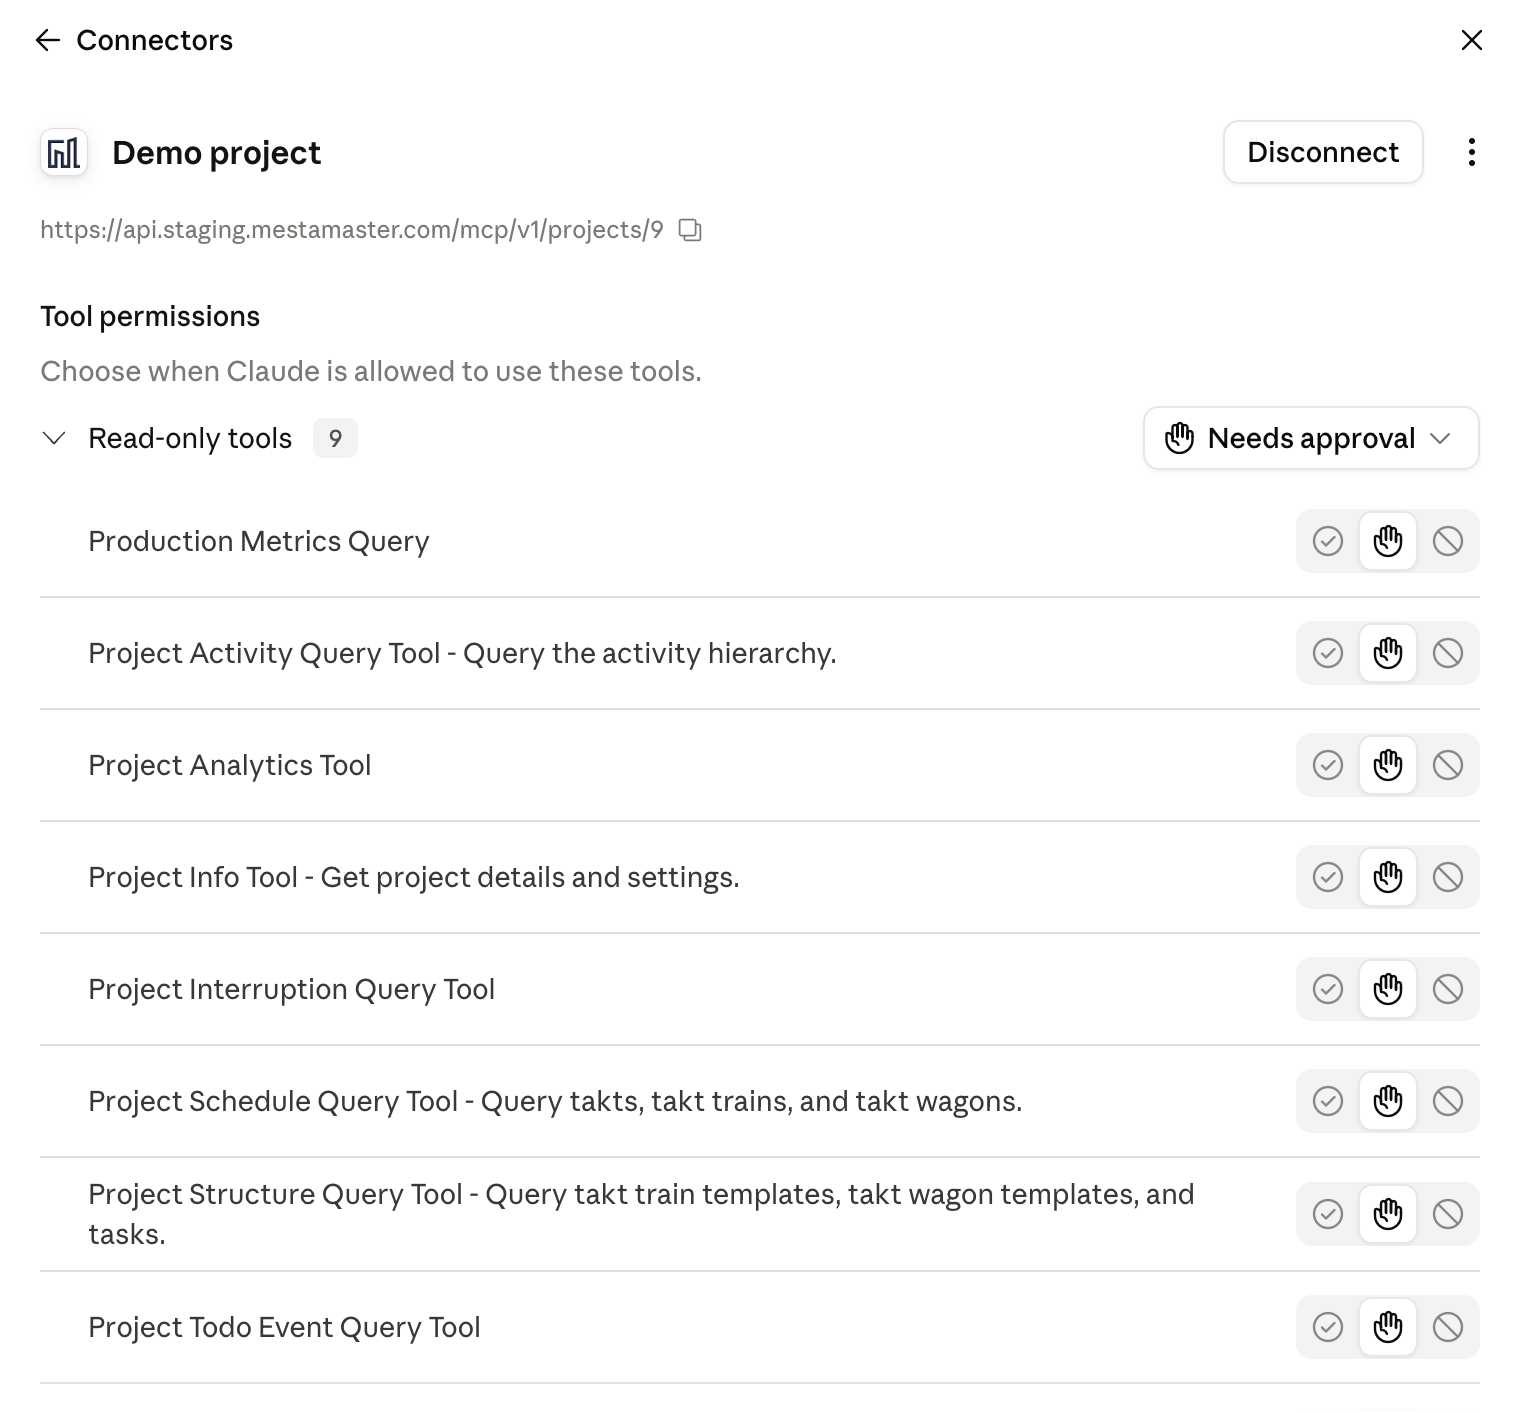
From the Mestamaster side, a project manager can switch External AI assistant off under Project settings → General → Features, which ends every assistant’s access to that project at once.
Other tools and config files
Everything below is for people comfortable editing configuration files, or connecting a tool this guide doesn’t cover step by step. You don’t need any of it for the setup above.
Claude desktop — config file
If you prefer to configure the desktop app by hand, use the mcp-remote bridge, which handles the OAuth sign-in for you. This requires Node.js installed.
Open your claude_desktop_config.json:
- macOS —
~/Library/Application Support/Claude/claude_desktop_config.json - Windows —
%APPDATA%\Claude\claude_desktop_config.json
Add a server entry, replacing the example address with your own project’s:
{
  "mcpServers": {
    "mestamaster": {
      "command": "npx",
      "args": [
        "-y",
        "mcp-remote",
        "https://api.mestamaster.com/mcp/v1/projects/YOUR_PROJECT_ID"
      ]
    }
  }
}
Save the file and restart Claude. The first time it starts, a browser opens for you to sign in to Mestamaster.
GitHub Copilot (VS Code)
GitHub Copilot uses MCP servers in Agent mode. You’ll need a recent version of VS Code with GitHub Copilot enabled.
Add the server
Create a file named .vscode/mcp.json in your workspace (or run MCP: Open User Configuration from the Command Palette to make it available in every workspace), replacing the example address with your own project’s:
{
  "servers": {
    "mestamaster": {
      "type": "http",
      "url": "https://api.mestamaster.com/mcp/v1/projects/YOUR_PROJECT_ID"
    }
  }
}
You can also add it interactively: open the Command Palette (Cmd/Ctrl + Shift + P), run MCP: Add Server, choose HTTP, and paste your project’s address.
Sign in and use it
- Open the Copilot Chat view and switch the mode selector to Agent.
- Click the tools (🛠) icon — you should see the Mestamaster tools listed.
- The first time you use a tool, VS Code prompts you to authorize — click Allow, then sign in to Mestamaster in the browser.
That’s it — GitHub Copilot can now query and act on your project.