This guide walks you through setting up a new project from scratch. Follow the steps in order — some things depend on others being set up first (you can’t build a schedule without spaces and templates, and you can’t set takt duration after you’ve already placed trains without replanning).
Estimated setup time for a medium-sized project: 1–2 hours.
Step 1 — Create the project
Go to your company page and click Add project. Give the project a name and address, also the start date and planned takt length.
If you want to change these after adding the project, go to Settings.
Step 2 — Configure Project Settings
Settings → fill in:
- Project name and Address
- Starts at — the date the first takt begins
- End date — the planned handover date
- Takt duration — how long takt lenght is (use 5 days as weekly)
- Weekends and holidays — check which days are non-working and add any site shutdowns or public holidays
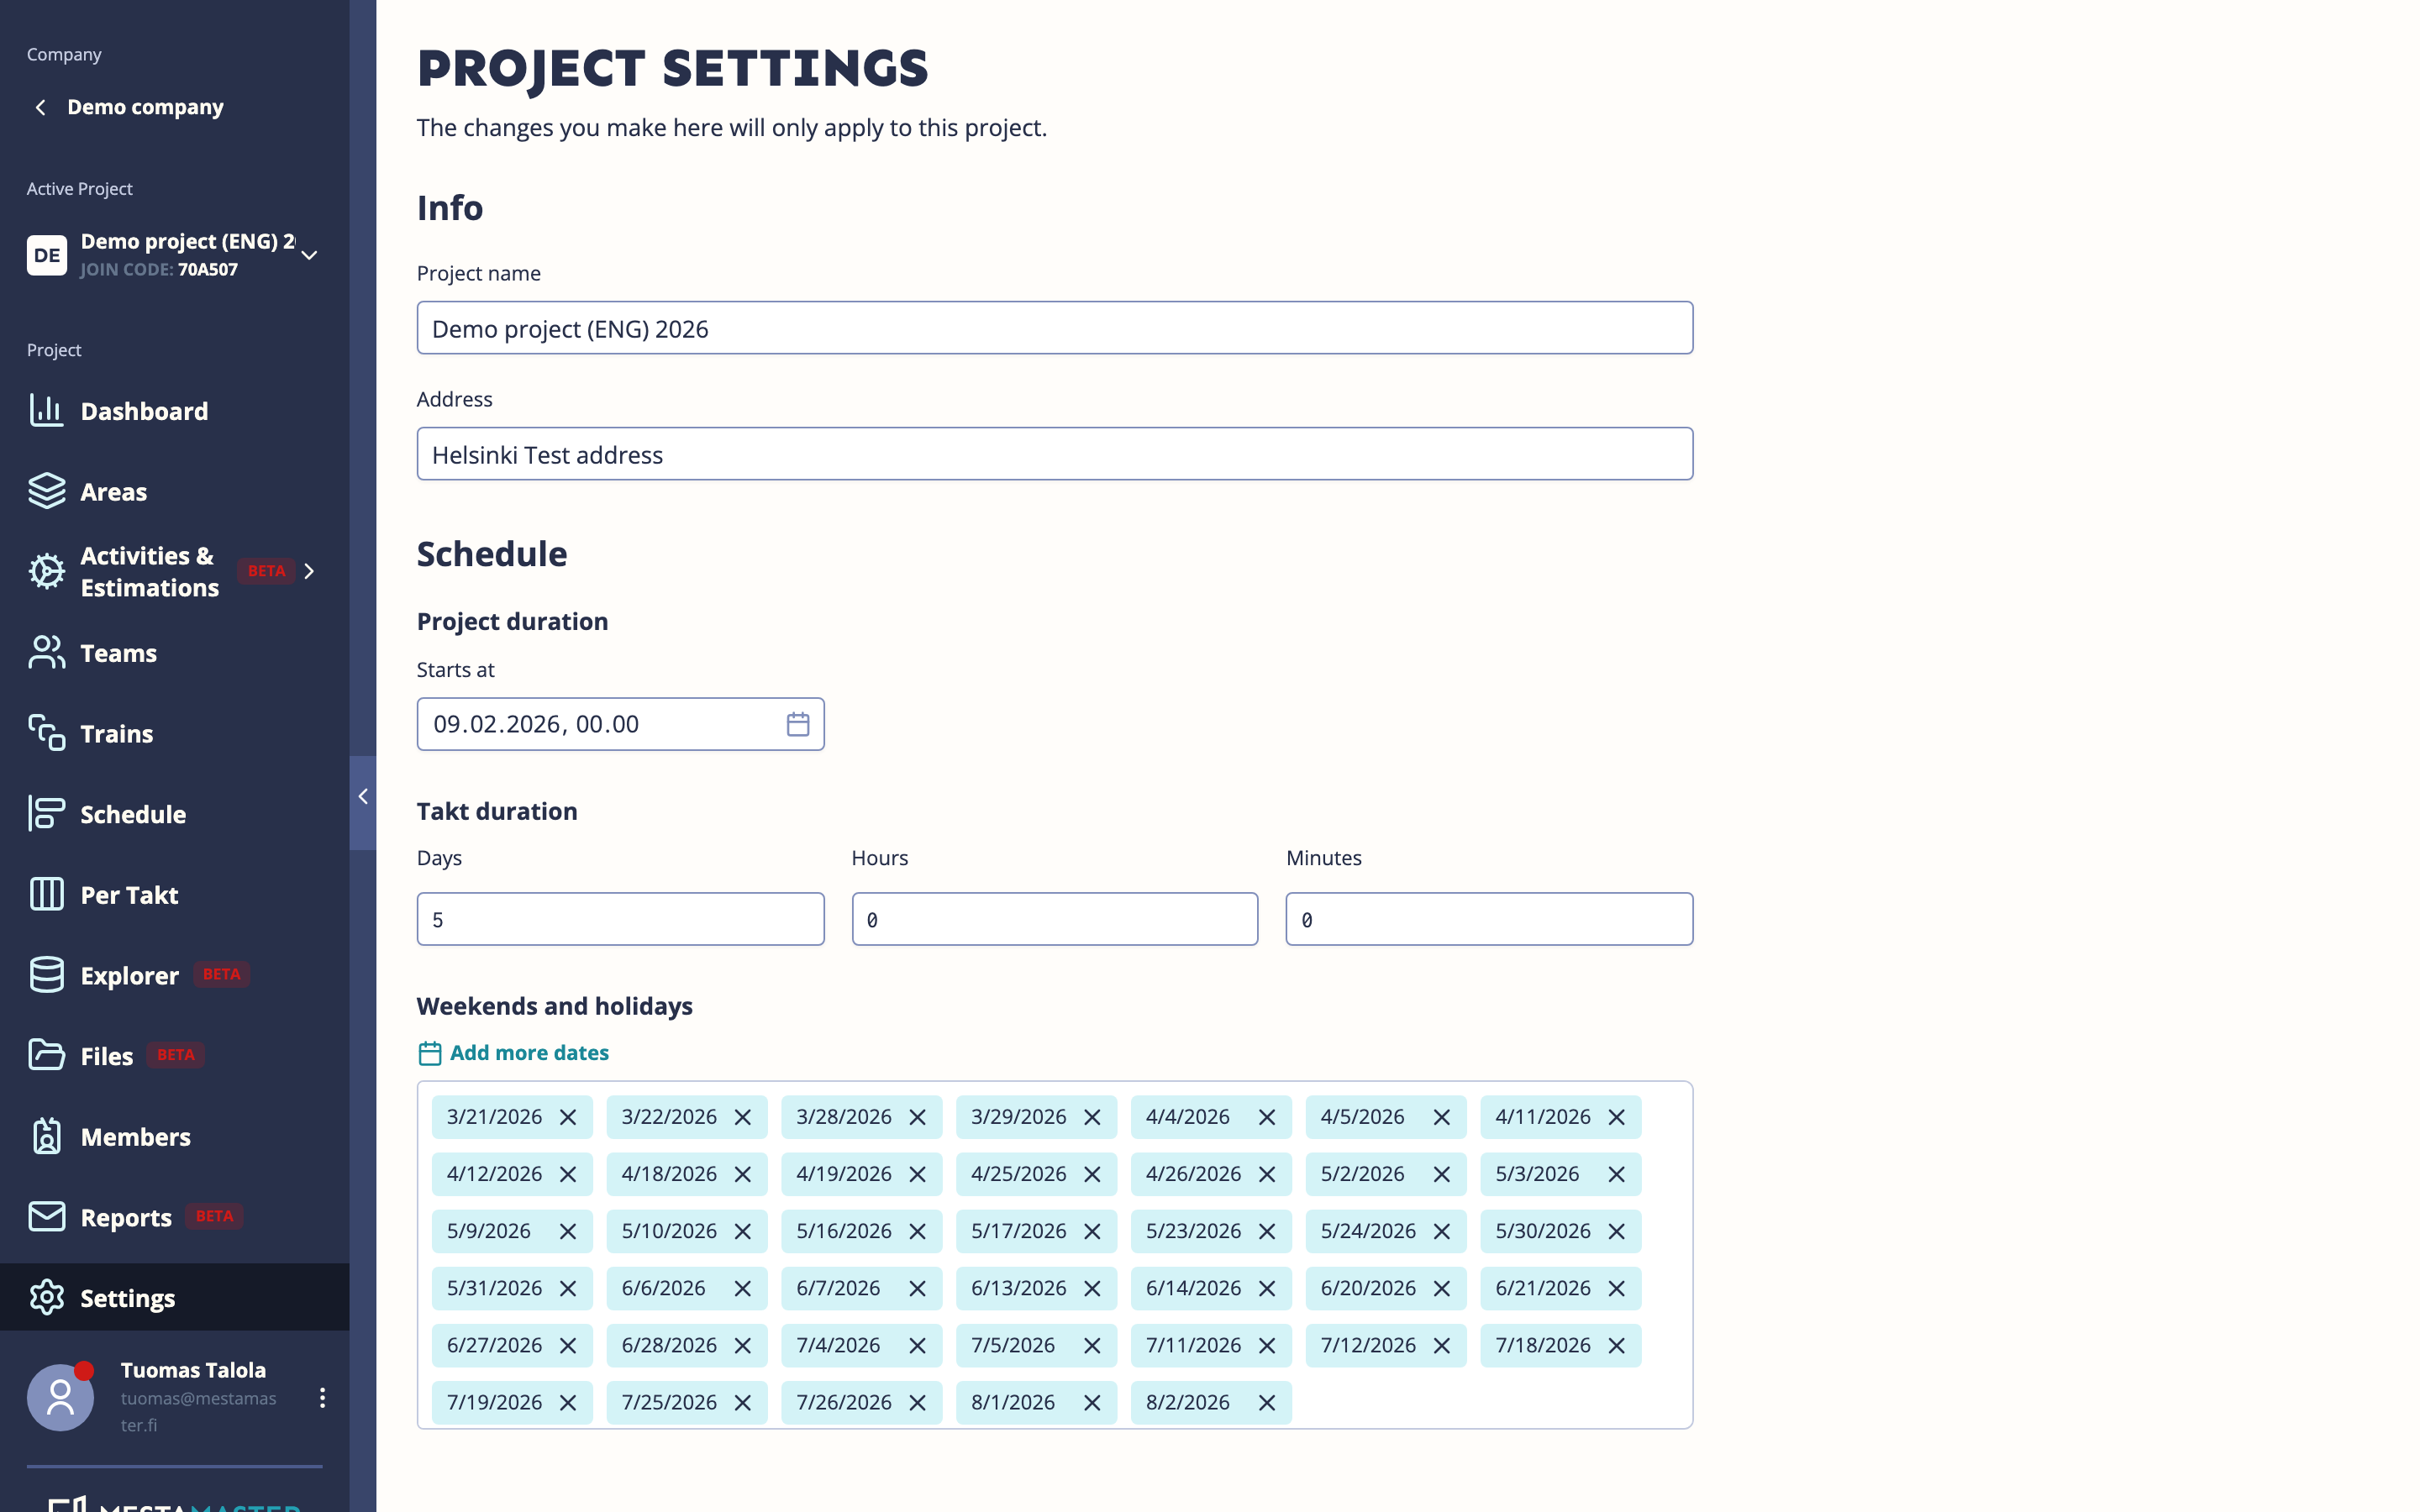
Do this before anything else. The takt duration determines how the whole schedule is divided. Changing it later means replanning the schedule.
Optional modules [available only for chosen beta-users]:
- Space aggregations — enables Slices (useful if you need cross-cutting views, e.g. by contractor scope)
- Estimations module — enables Space Properties and Activity Estimations (skip for now if you’re not doing labor planning)
→ See Project Settings for full details.
Step 3 — Build the space hierarchy
Areas → add your building structure.
For small projects, add spaces manually using Add Space. For anything larger, use Import — download the Excel template, fill in your hierarchy, and upload it back. This saves significant time.
A typical hierarchy:
Building
├── Floor 1
│   ├── Apartment 101
│   ├── Apartment 102
│   └── ...
└── Floor 2
    └── ...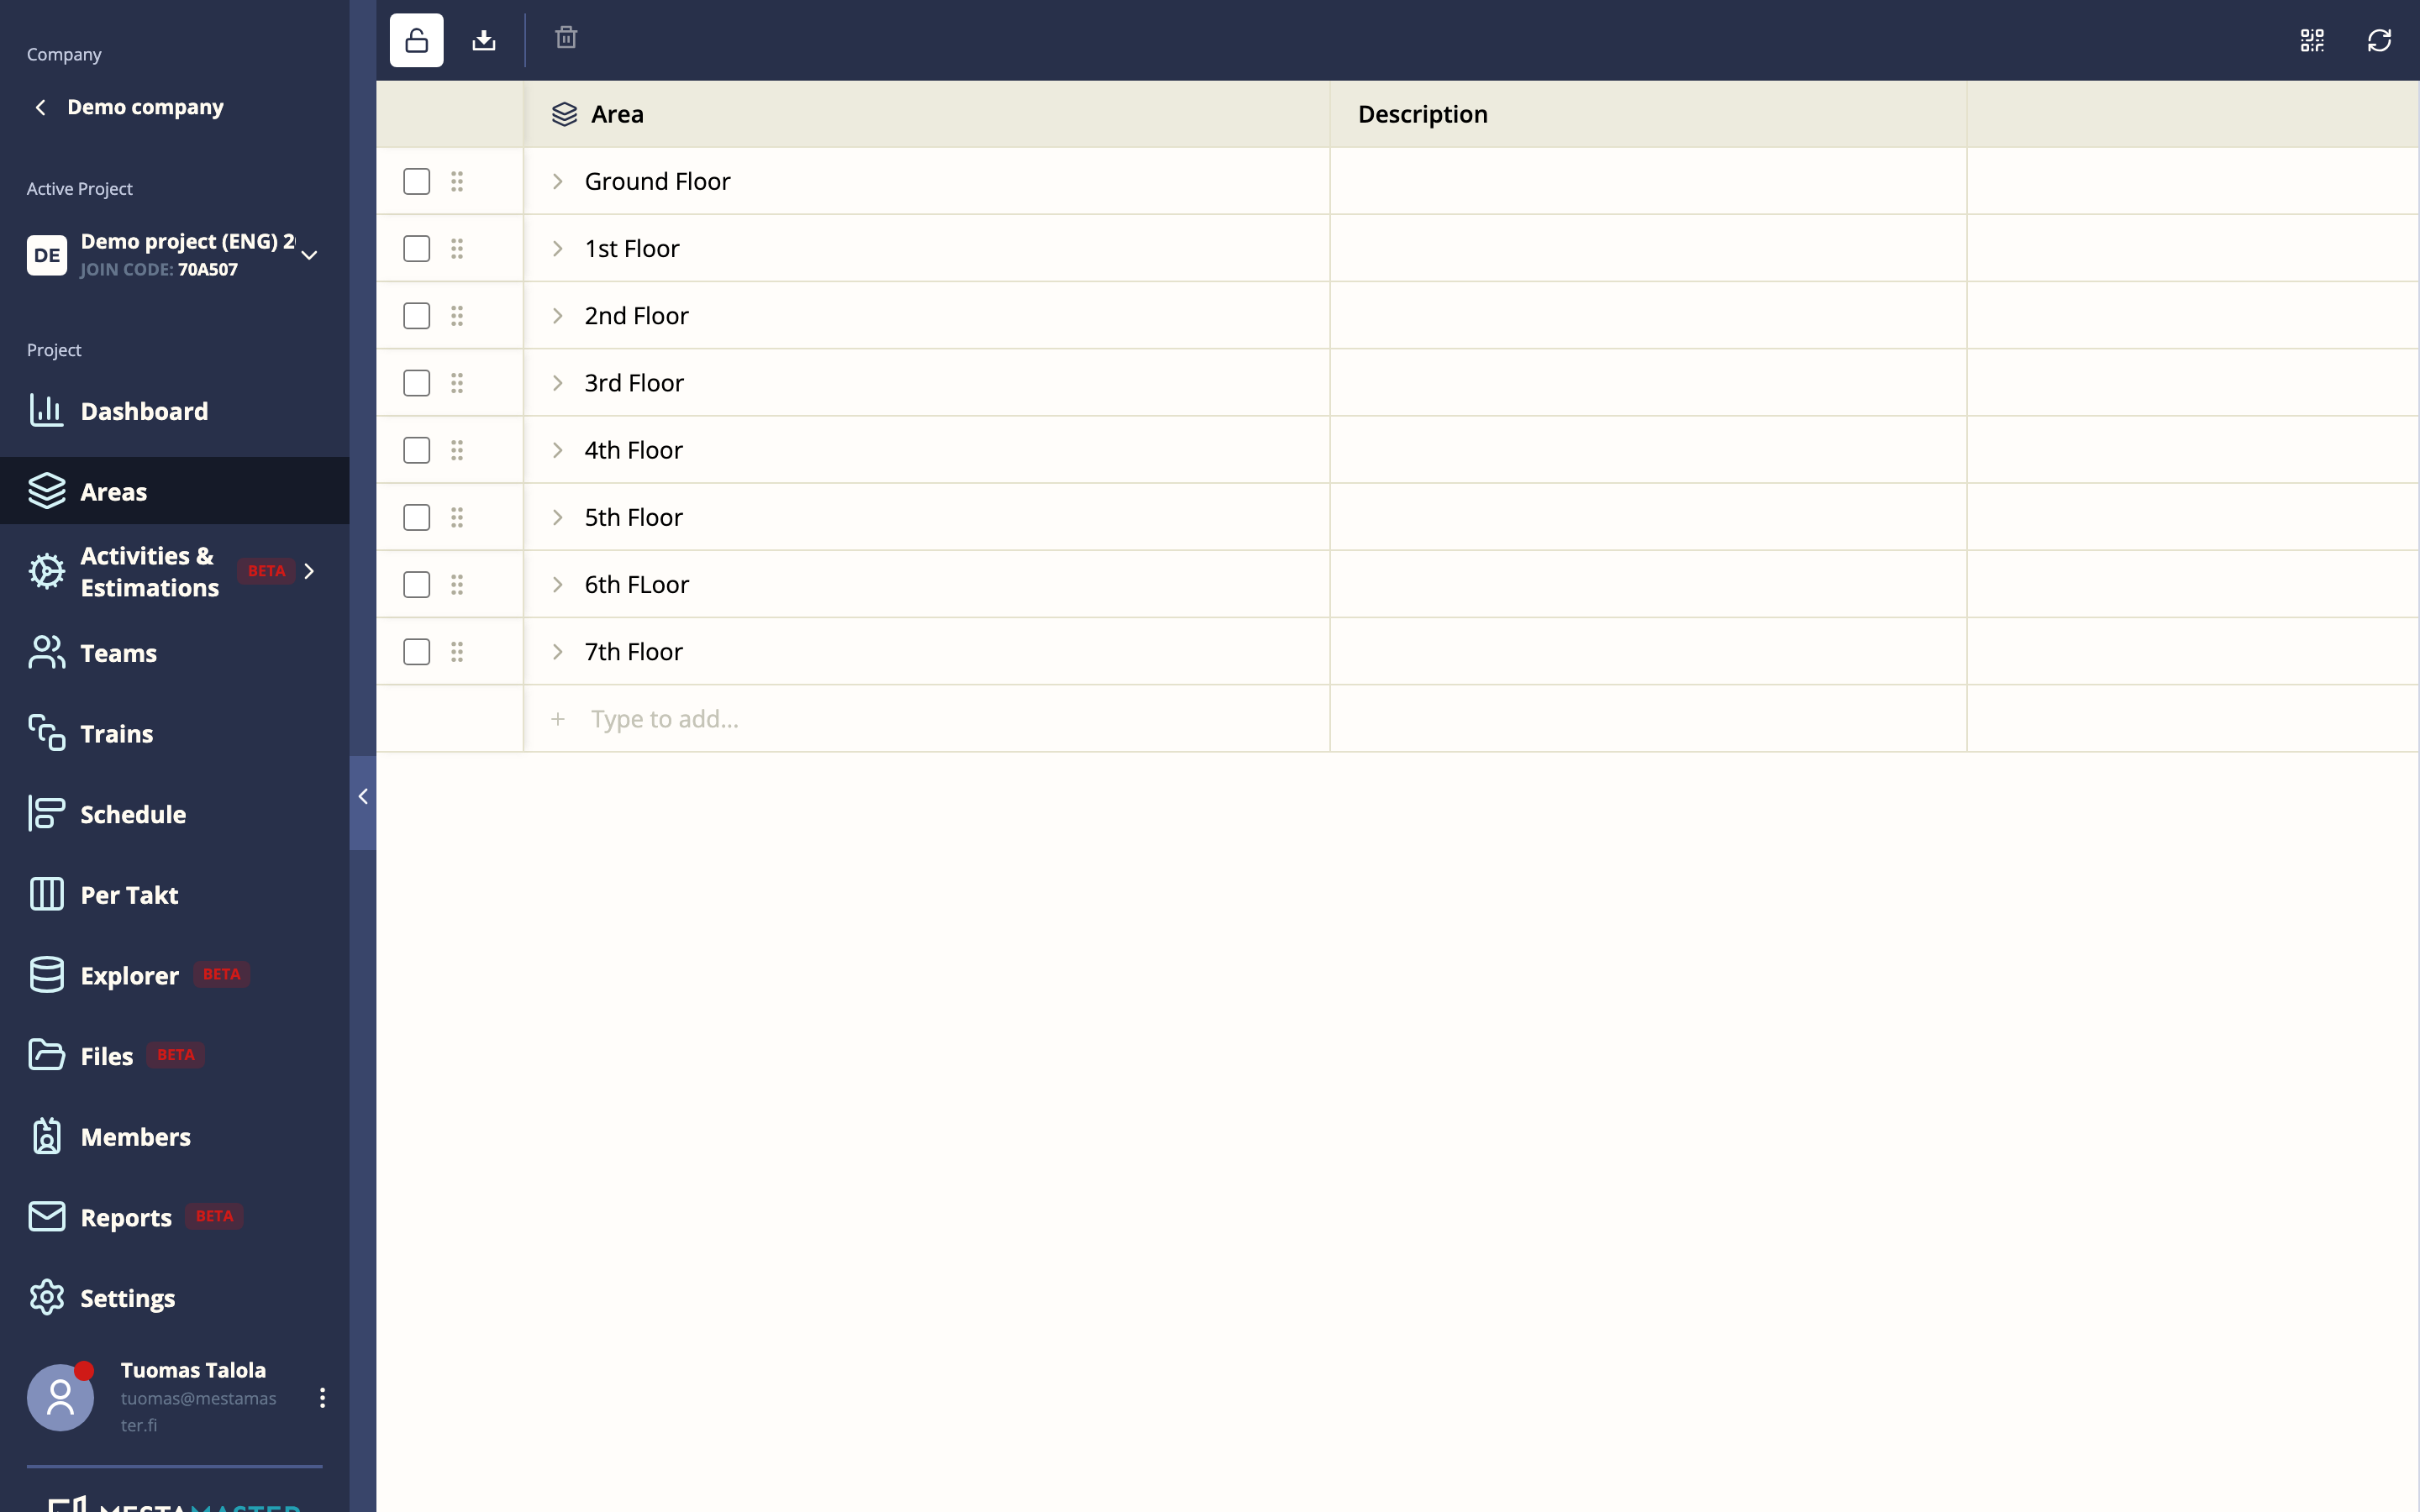
Go as deep as you need. Tasks will be assigned at the leaf level (individual rooms or zones).
Optionally download QR codes once your spaces are set up — print and post them on site for workers to scan.
→ See Areas & Spaces
Step 4 — Set up activities
Activities → define the work categories.
Click Import Activity Set and select a preset that matches your project type. This gives you a ready-made hierarchy of activities (structural, MEP, finishing, etc.) that you can trim or extend.
If no preset fits, add activities manually with a name and short code.
→ See Activities
Step 5 — Create teams
Teams → define your trades.
Click Suggest teams to generate a starter set based on your project type — this is the fastest way to get going. Review the list, uncheck any trades that don’t apply, and click Add teams.
For each team, set a distinct color and badge — this is what makes the schedule readable at a glance.
Then add members: use Invite by email for office staff and Invite by phone for site workers.
→ See Teams
Step 6 — Build takt train templates
Takt Trains → define your work phases.
Each train template represents one repeating phase (e.g. “MEP Rough-in”, “Finishing”). Inside each train, add wagons (one per trade) and tasks inside each wagon.
For each task, assign:
- A team — who does the work
- An activity — what type of work it is
- An estimated duration — how long it takes
A typical setup for a finishing phase might look like:
Finishing (train)
├── Plastering (wagon) → team: Plasters → task: Wall plastering
├── Painting (wagon)  → team: Painters → task: Interior painting
└── Flooring (wagon)  → team: Flooring → task: Floor installation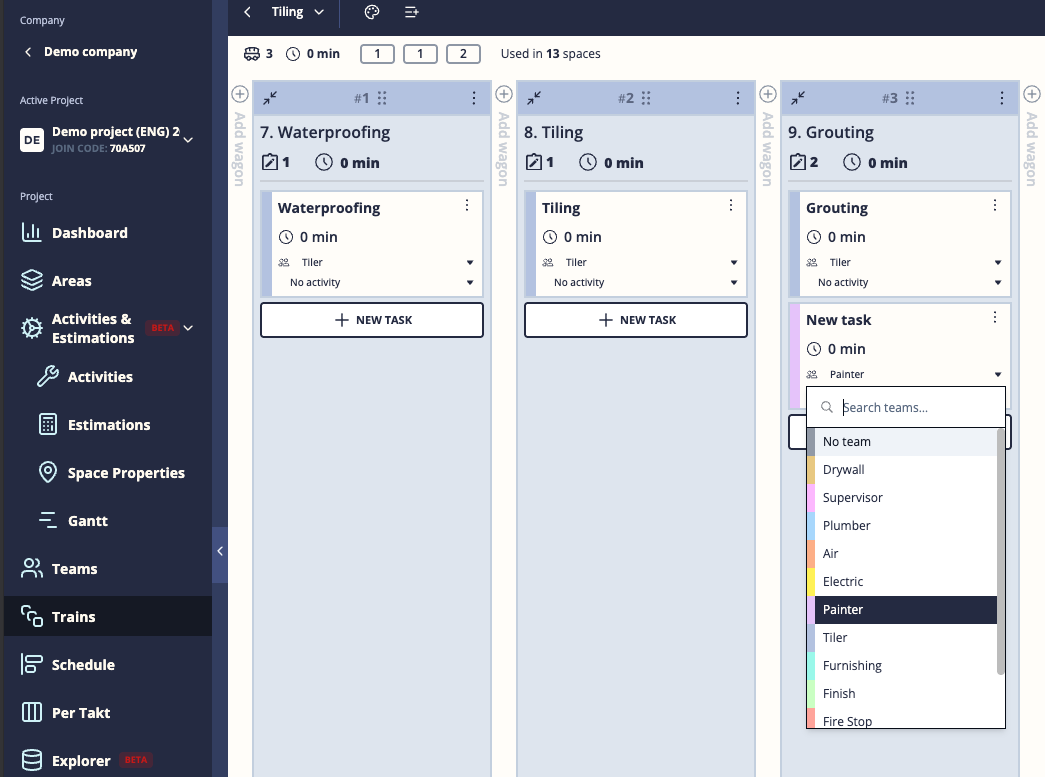
Use Clone template if you have two similar phases that differ only in scope or timing.
→ See Takt Train Templates
Step 7 — Build the schedule
Schedule → place your train templates across spaces and time.
- Click the Add new trains dropdown in the toolbar and select a template
- Click a cell (space × takt) to place the first train — this enters anchor mode
- Keep clicking to place the same template in more spaces
- Press Escape when done
- Repeat for each template
Work from left to right in time — start with the earliest phase, then add later phases so the trains flow through the building in sequence.
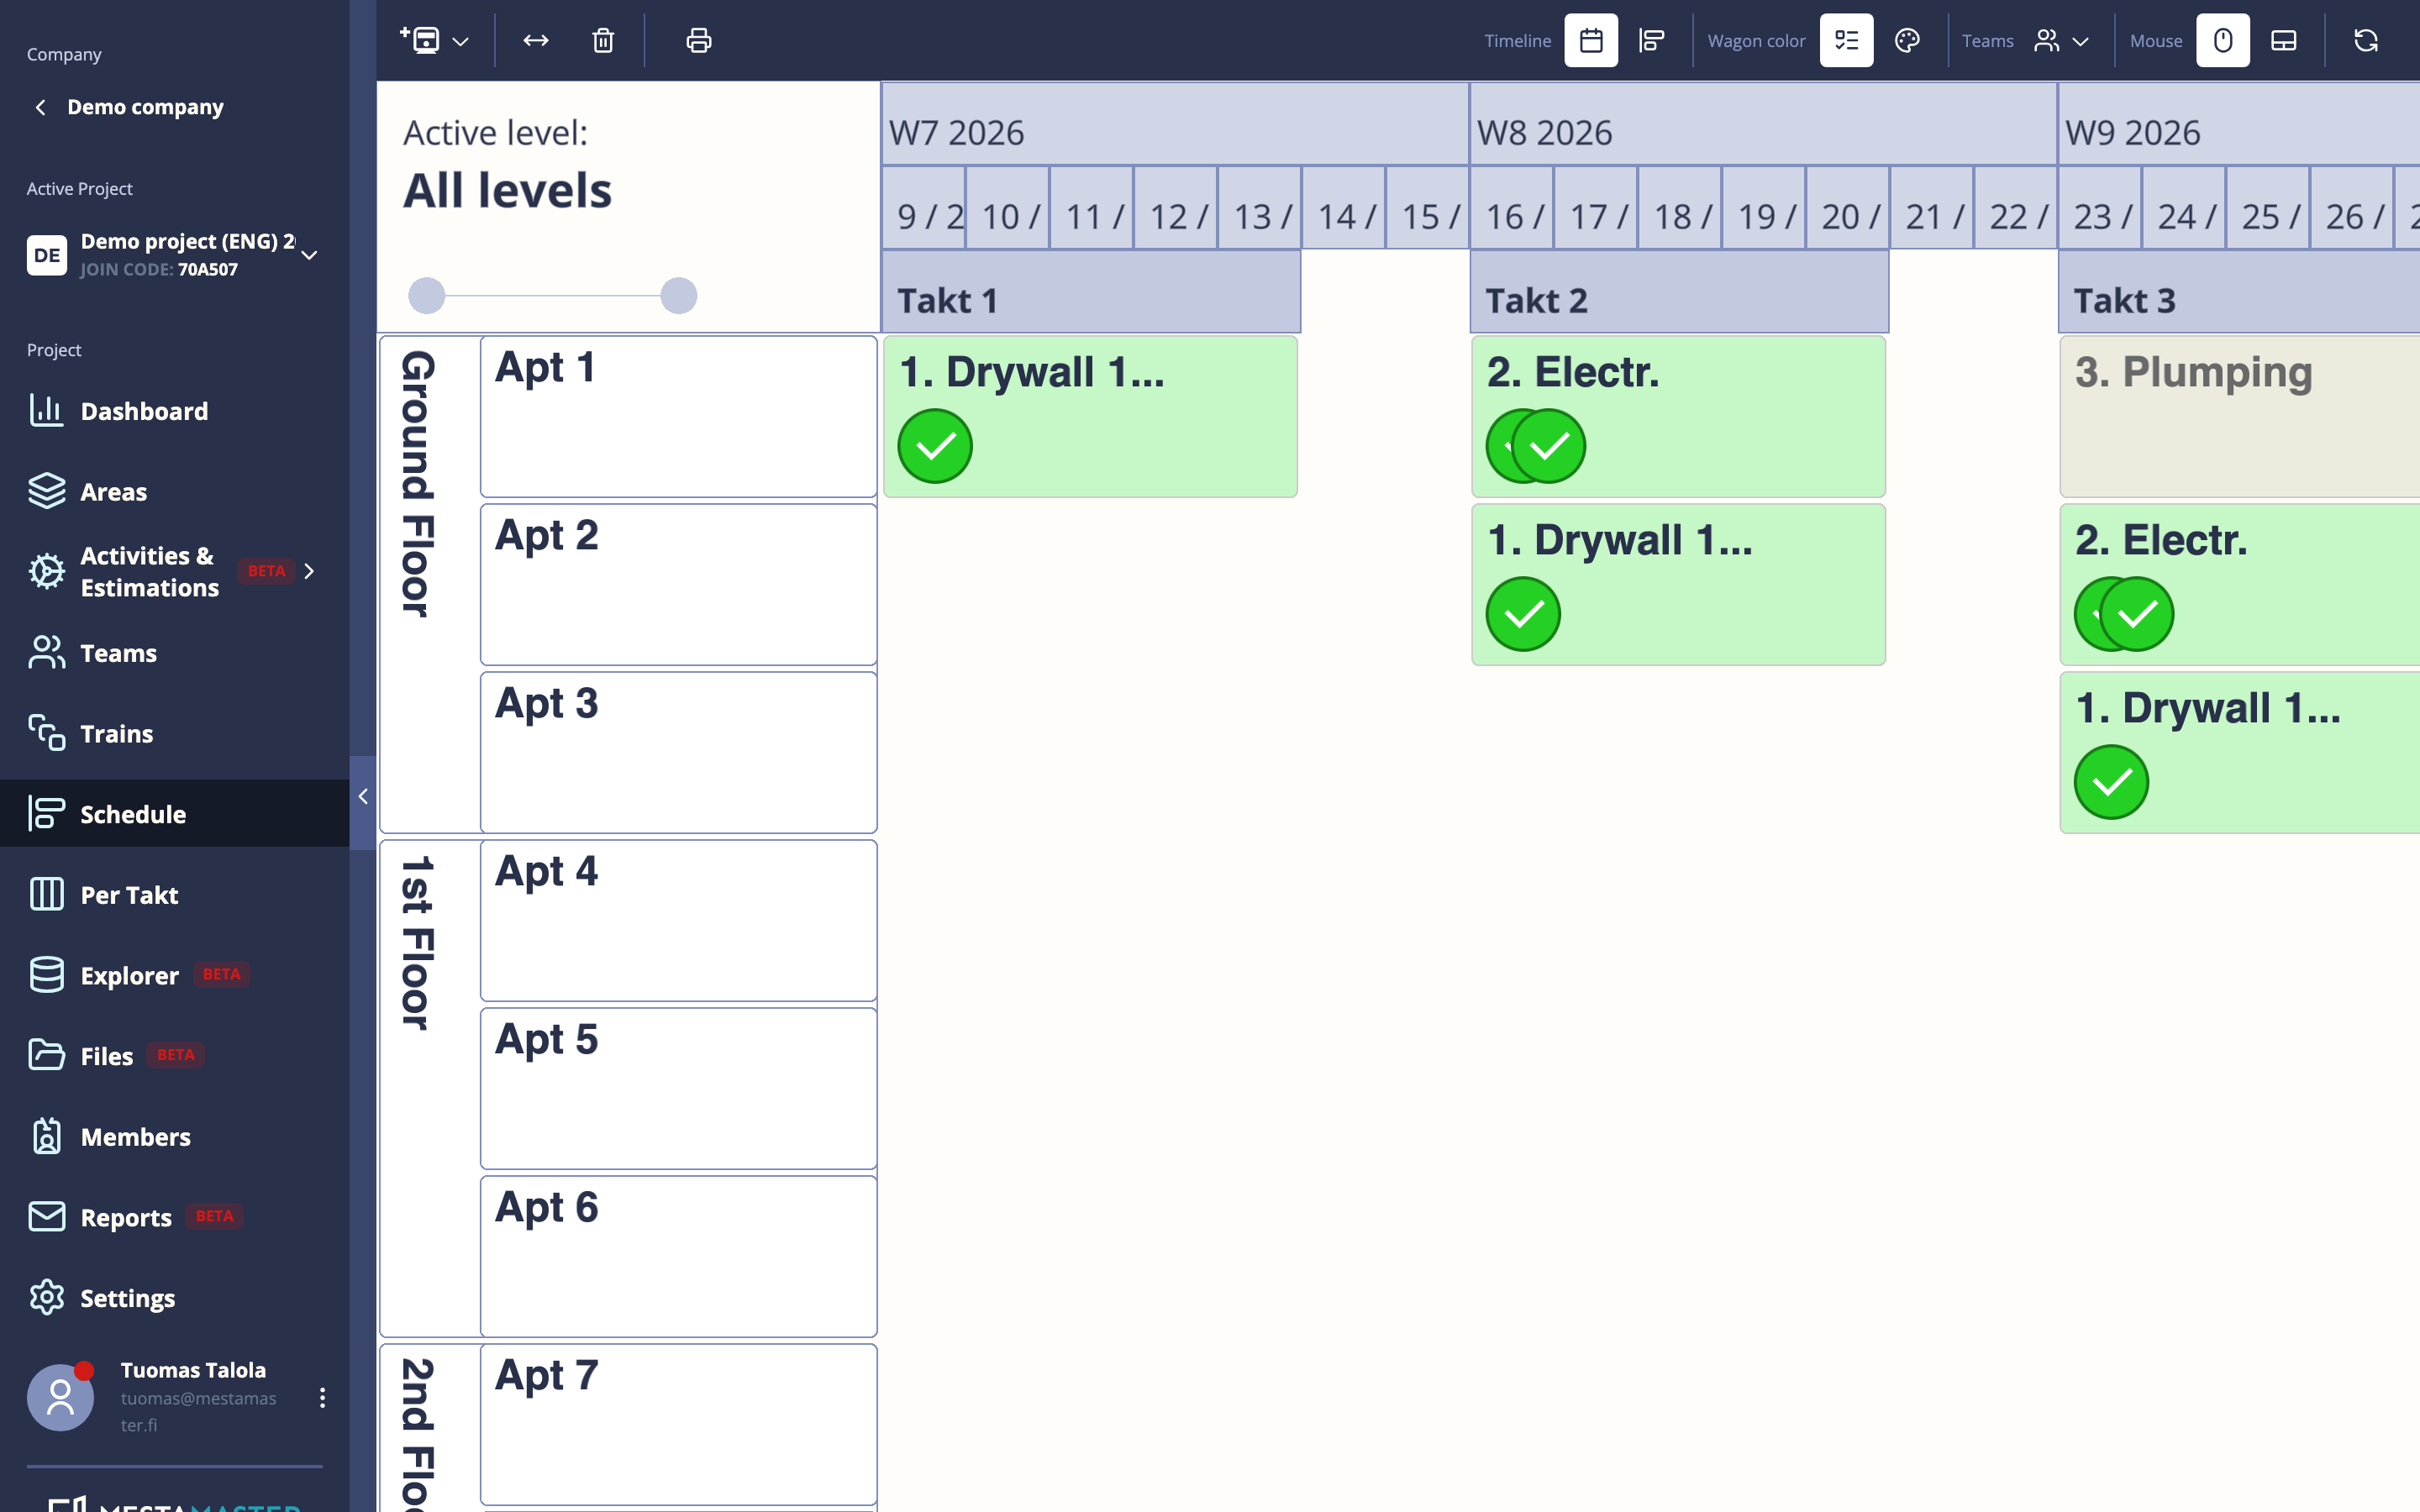
Use Active level in the toolbar to focus on the right hierarchy level. Use Wagon color → Color wagons by status during execution to see progress at a glance.
→ See Schedule
Step 8 — Invite project members
Members → add everyone who needs access.
- Editors — site managers, BIM coordinators, anyone who manages the schedule
- Members — foremen, subcontractor supervisors, workers
- Guests — clients, inspectors, external observers (view-only)
Use bulk invite (comma-separated emails or phone numbers) to onboard a whole team at once.
→ See Project Members
Step 9 — Set up reports (optional)
Reports → add stakeholders who should get automated status emails.
Add their email addresses and preferred language, then set a schedule (weekly on Friday is a common choice). They’ll receive updates without needing to log in.
→ See Reports
You’re ready
Once the schedule is built and teams are invited, workers can log in via the Toolbelt app and see their tasks immediately.
During the project, your main views will be:
- Dashboard — daily health check
- Per Takt — weekly huddle with foremen
- Explorer — investigating specific tasks or interruptions
- Schedule — making adjustments to the plan
→ See also: Quick Start: Foreman