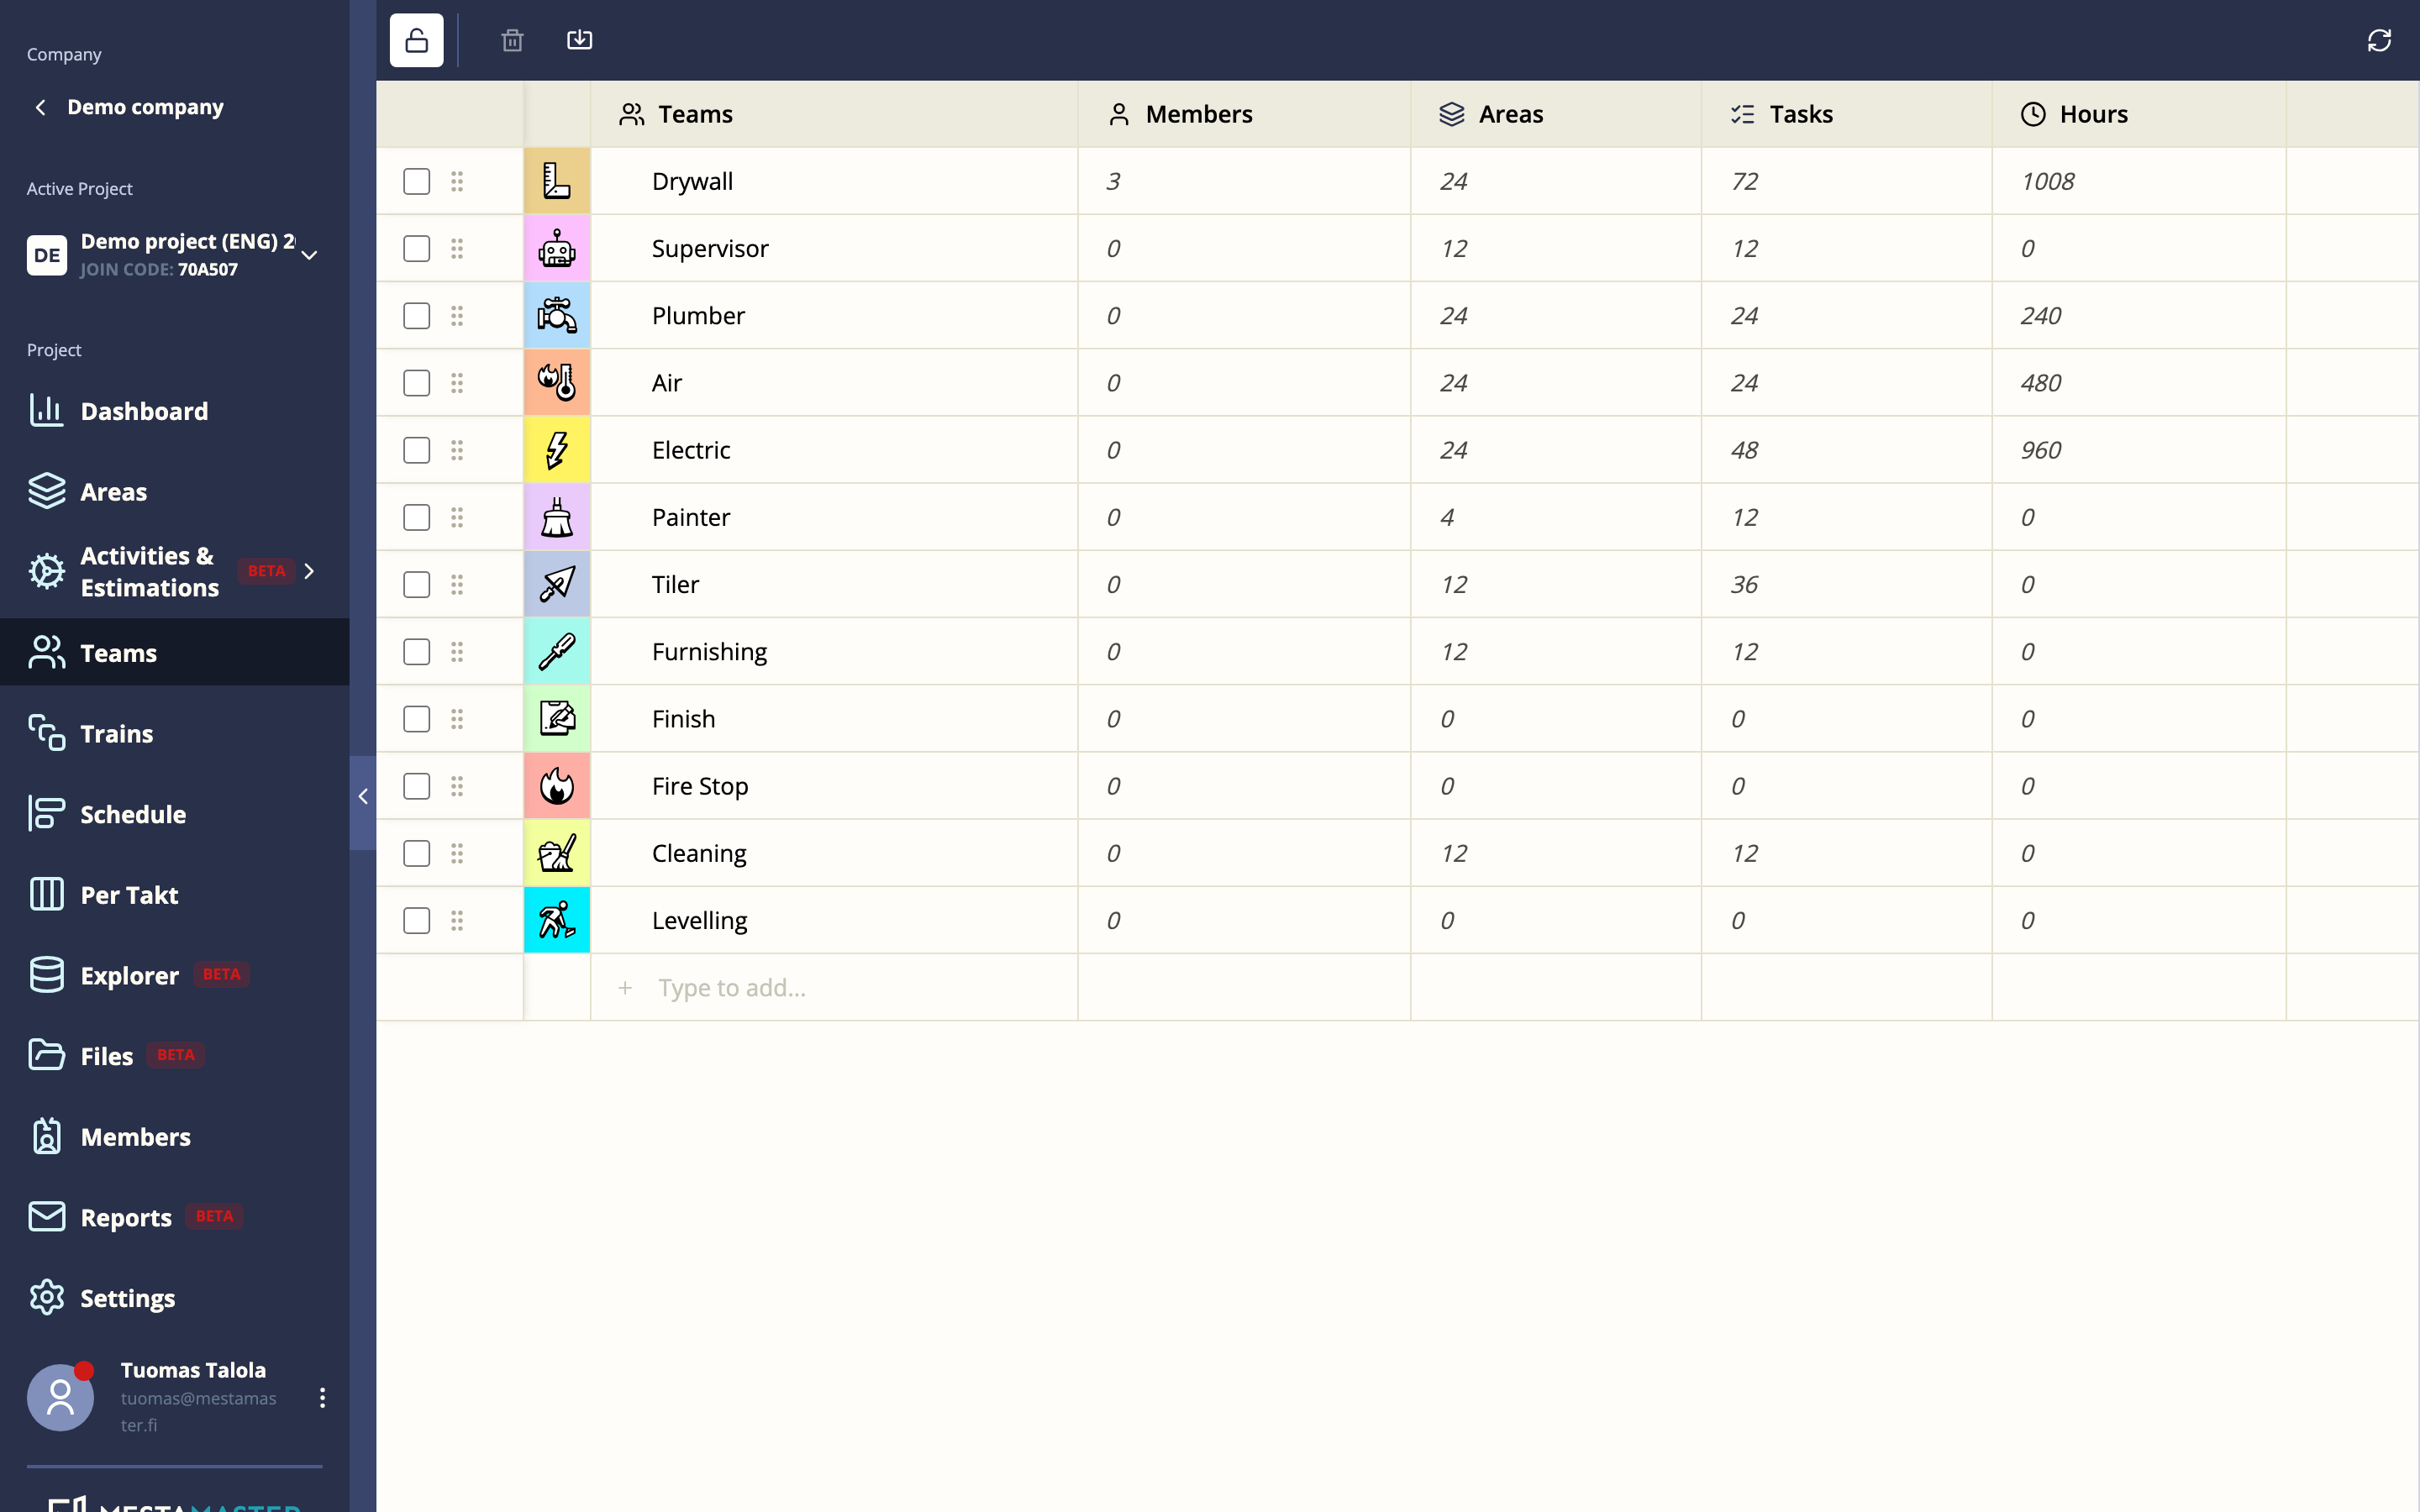
Teams represent the contractor groups and trades working on your project — electricians, structural workers, painters, and so on. Every task is assigned to a team, which determines who does the work and whose color appears on the schedule.
Getting there
Open a project → Teams
Creating a team
Click New team and enter a name. You can then set:
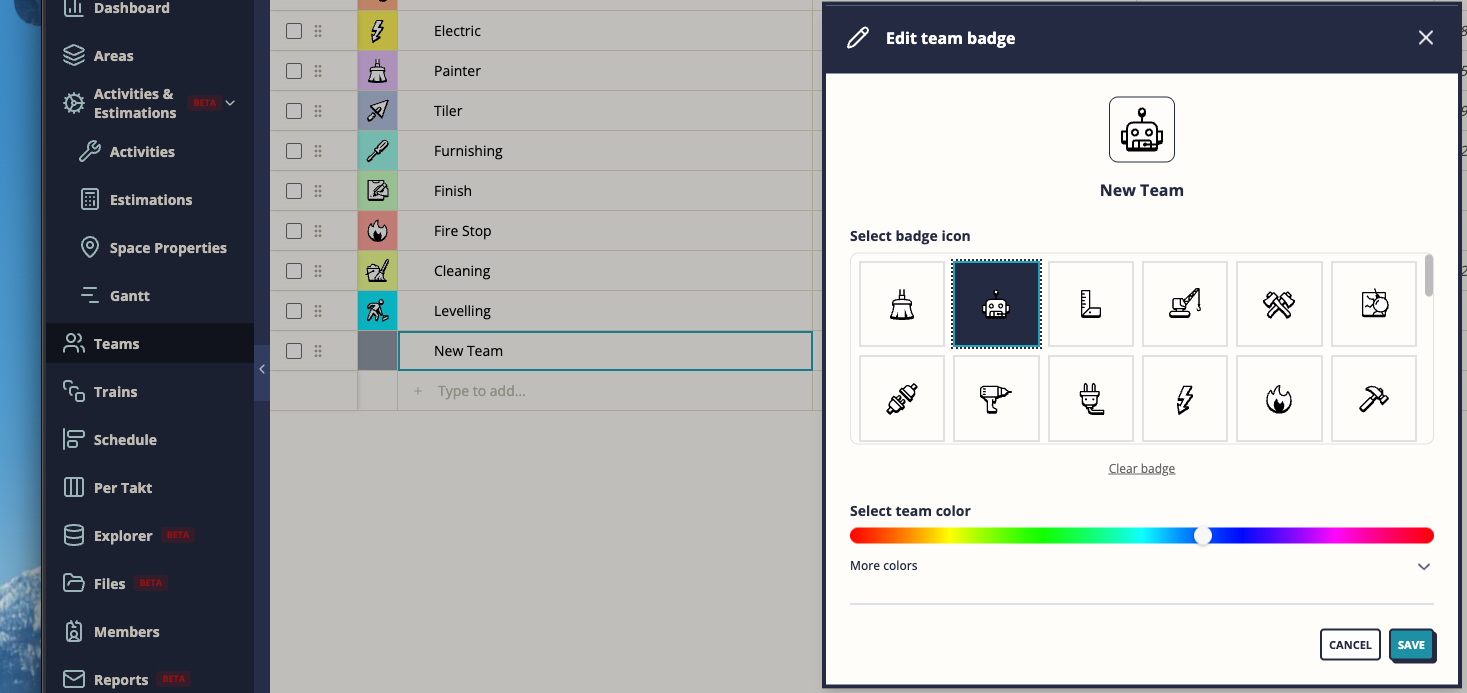
- Color — the team’s color across the schedule and charts. Use the hue slider for quick selection or expand More colors for full RGB control.
- Badge — an icon shown alongside the team name (hammer, wrench, paint roller, and 40+ other options). Some badges are locale-specific.
Import teams
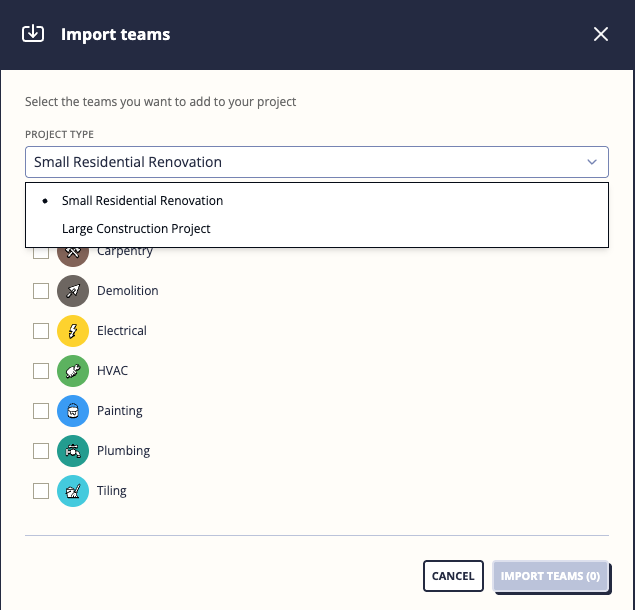
For a new project, Import teams generates a starter set of teams based on your project type (residential, commercial, infrastructure, etc.).
- Click Import teams on the top menu
- Select a project type from the dropdown
- Review the suggested teams — check or uncheck any, and rename them inline
- Click Add teams to create them all at once
Teams that already exist in your project (matched by badge) are automatically unchecked to avoid duplicates.
Team members and analytics
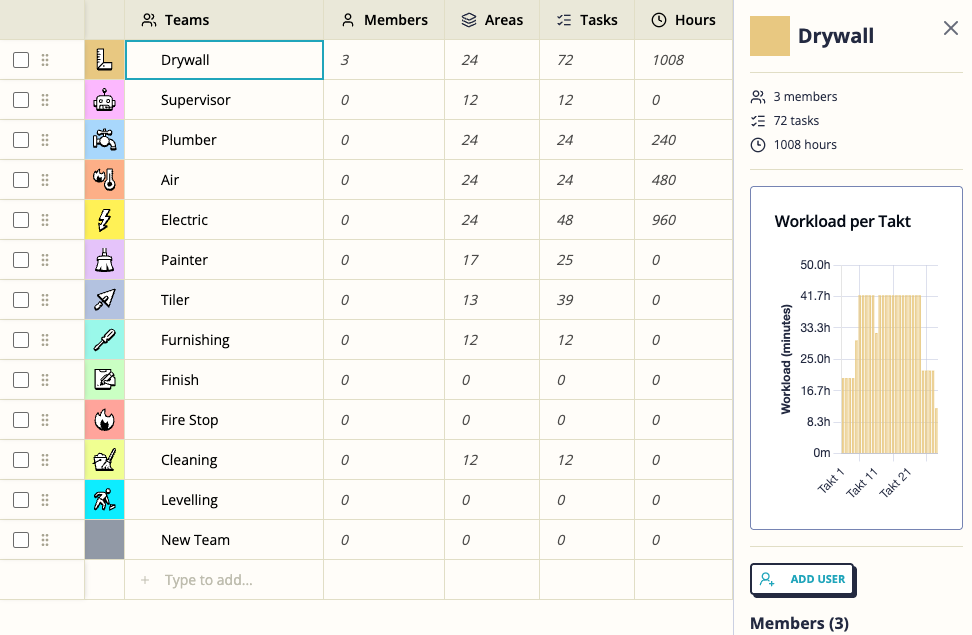
The team list shows summary stats for each team at a glance:
| Column | Description |
|---|---|
| Members | Number of users on the team |
| Areas | Spaces where this team has tasks |
| Tasks | Number of tasks assigned to this team |
| Hours | Total estimated work hours |
| Workload | chart showing planned workload (in minutes) per takt for each team |
Tips
- Assign a distinct color to each team — this is the most important configuration step, as the schedule becomes much easier to read when each trade has a clear visual identity.
- Match team colors to physical vests or helmets if your site uses color-coded PPE — workers instantly recognize “their” color on the schedule.
- Phone invitations are the most reliable way to bring site workers onto the mobile app without requiring them to have a work email address.